Rasmus Fleischer made an interesting appeal earlier today.
Allt jag önskar mig till jul, eller snarare till första advent: att ni alla kan motstå frestelsen att dela er "Spotify Wrapped".
I stället föreslår jag att ni delar var sin personlig reflexion kring ert musiklyssnande 2025: hur ni lyssnat, på vilken musik, vad som faktiskt har berört er.
He’s saying why not share a personal reflection about your relationship with music in 2025 instead of just posting data visualisation screenshots from a bloody app. I sympathise with the sentiment here. Here’s a rough draft of one for me.
One of the kids got a cassette player for his birthday and listened to the Aristocats soundtrack so much on it that the tape wore out and broke. Then we miraculously found a vinyl copy of it for 10kr in a second hand shop. It's simultaneously the cheapest and one of the most joyful things we own. Also its cover has the same colour scheme as Never Mind The Bollocks so it's easy to confuse the two when browsing. An object of considerable psychic power in other words.

The headlines about Bob Vylan’s Glastonbury set led me to discover my new favourite band. I fell in love with their entire body of work overnight and have spent a lot of time listening to it while removing zionist graffiti from my local neighbourhood. Check out Pretty Songs or We Live Here.
For a few weeks I got super into the management simulation game Factorio. I was learning how to automate blue science when it hit me that I could have learned an entire musical instrument for less effort than this. Since then I’ve amassed three harmonicas and half filled a Moleskine music notebook.
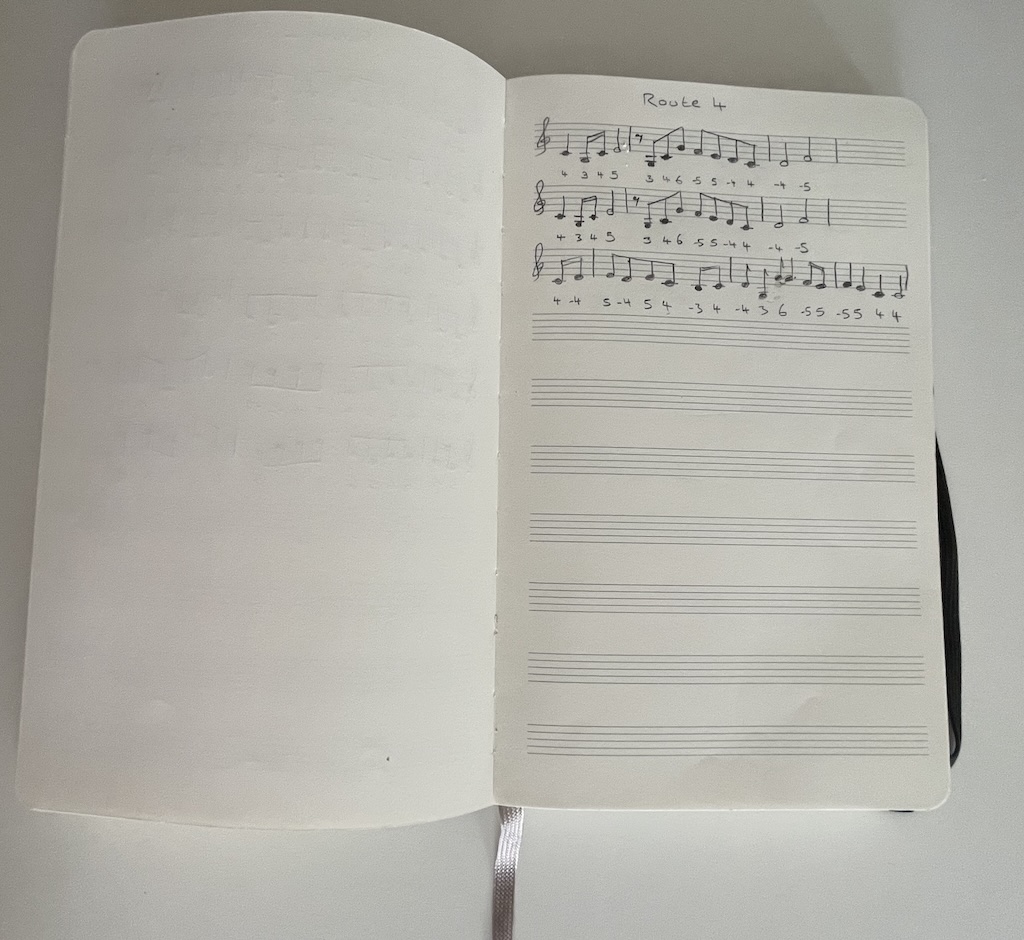
You’re meant to play blues on harmonica mainly I think, but so far my fav shit to play is the Pokémon Red/Blue soundtrack. Apart from nostalgia I think a big part of that preference comes from the fact that tabs were impossible to find for much of it, so I often had to transpose sheet music arranged for other instruments. Friction gave it meaning. Haven’t touched Factorio since BTW.
After some considerable stubborn resistance on my part, my very patient wife convinced me to watch a documentary about some boring old Swedish punk band I didn’t really want to hear about. Thus did I discover Ebba Grön. A week later I found myself listening to Beväpna Er on repeat for almost the full duration of a snabbtåget journey from Malmö to Stockholm. And I now have a full-blown obsessive fixation on the lyrics of the first verse of Staten och Kapitalet.
Kapitalet höjer hyrorna och staten bostadsbidragen. Så kan man fiffla en smula med den järnhårda lönelagen. Och till och med betala mindre i lön än priset för mat och för hyra. För staten skjuter så gärna till om levnadsomkostnaderna blivit allt för dyra.
We've had a car a little over a year now and I love having a fav radio station turn on immediately when it starts. Feels just like GTA. Mine's Din Gata, which is a hip hop station whose only FM transmitter is in Malmö. Driving out of town, it tends to cut out after Helsinborg or Höör, at which point Rock FM or Retro FM usually come on instead. There is a fun sense of homecoming on the way home upon coming back within FM range of Din Gata and switching back.

The year’s most unforgettable music moment came unexpectedly during the first of several trips to see A Minecraft Movie, when the entire audience sang along to Steve’s Lava Chicken. Incredible experience. We are a Lava Chicken household at this point and any chicken-adjacent food can be made instantly delicious simply by declaring it to be lava chicken.
I think Rasmus was really onto something with this post today. There's an element of decomputing to it almost, in that it's an implicit critique of the datafication of music's role in our lives. The cultural clout of this annual surveillance capitalism PR campaign reflects so much of what's gone wrong with our society. Music is an art form that permeates our whole society and our relationships with it are so much more interesting than our telemetry data from an app we sometimes use.